From Zero to a Live Database in 90 Seconds
Welcome to AgenticSQL. This guide will walk you through the single command needed to analyze your project and deploy your first production-ready PostgreSQL database. No AWS account required to start. No credit card needed.
Step 1: Run the Agent
Open a terminal in your project's root directory. Whether it's a Next.js, Python, or Flutter project, the command is the same. Run the following:
npx @agenticsql/cliStep 2: Open Your Command Center
When prompted, type Y and press Enter. The AgenticSQL CLI will automatically open your personal Command Center in your browser. If you're new, you'll be asked to sign in with GitHub or Google.
By continuing, you agree to AgenticSQL's Terms of Service and Privacy Policy, and consent to receive occasional updates via email.
Step 3: Deploy Your Foundation
Our CLI generated a schema.sql file in your project. Simply drag and drop this file into the 'Quick Deploy' area on your dashboard and click the 'Deploy Database' button.
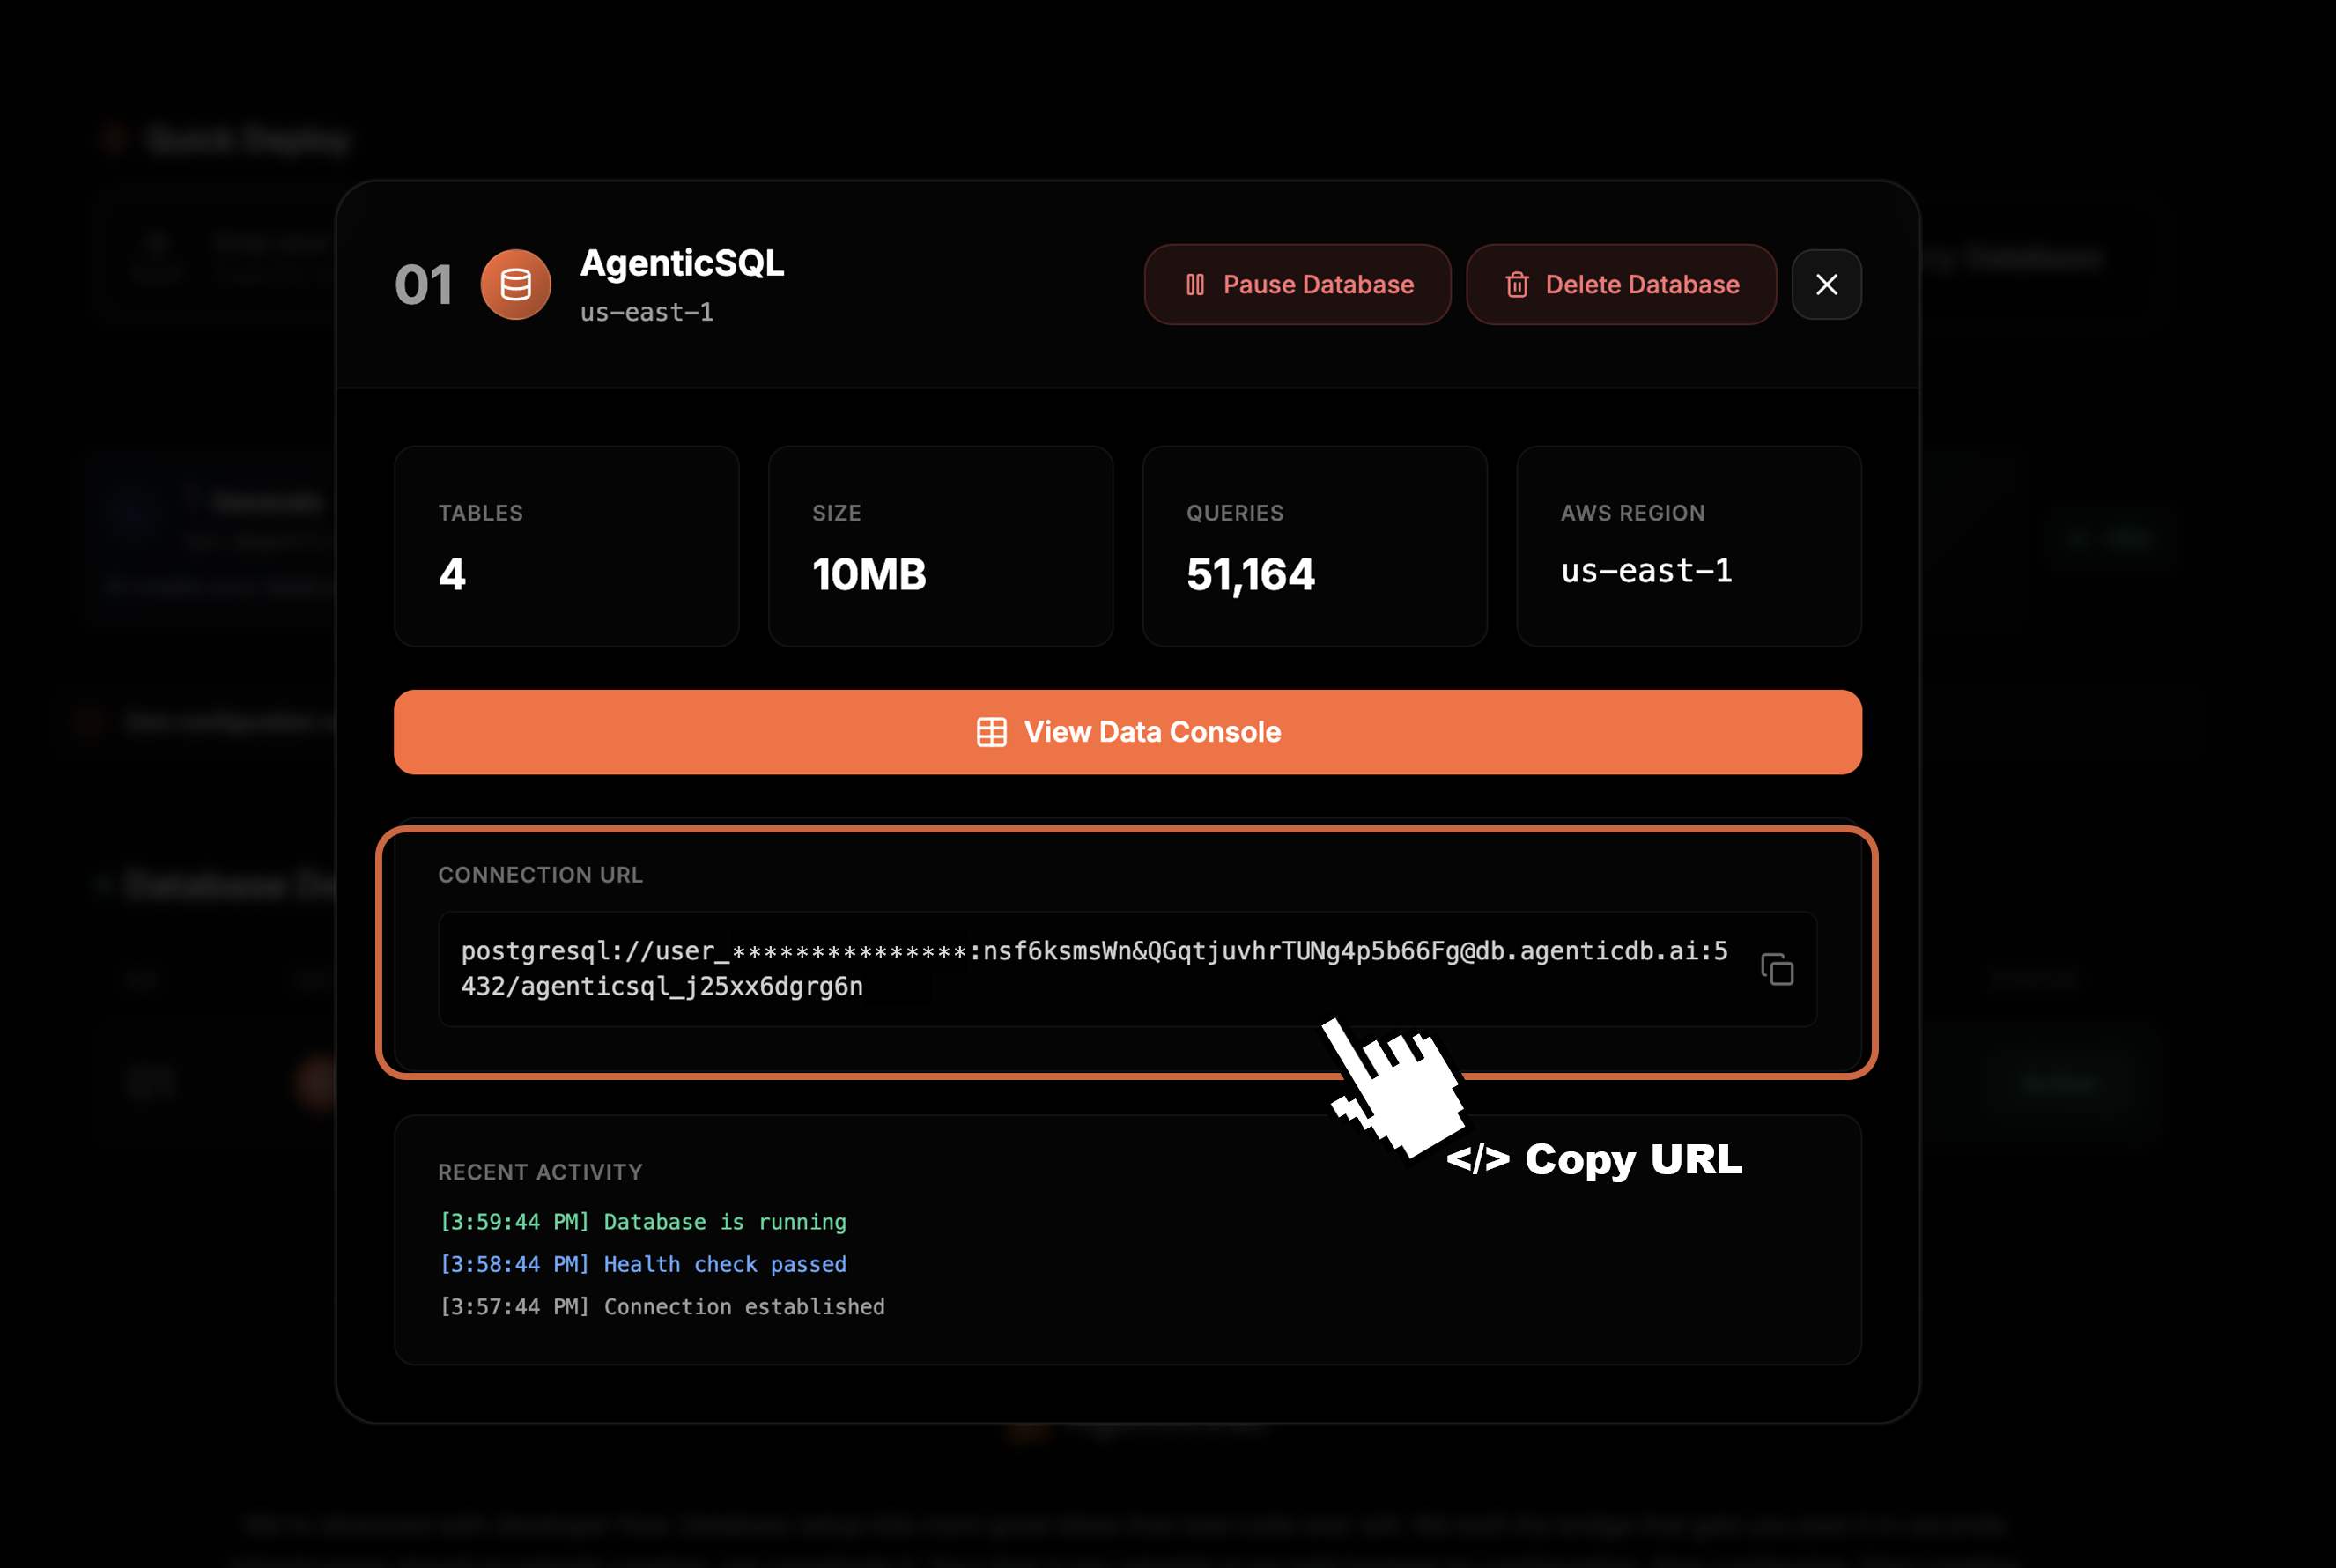
Step 4: Connect & Build
That's it. In about 60-90 seconds, your database status will turn Active. Copy the connection URL provided and paste it into your application's environment variables (DATABASE_URL). Your infrastructure is live.
Your Empire is Founded.
You just accomplished in seconds what takes most developers days. You didn't configure a VPC, you didn't write a single line of SQL, you didn't touch the AWS console. You stated your intent, and we manifested the infrastructure. Now, go build.